To add a new form object, first select an empty cell in the grid. Then select the object from the palette that opens when you click the Insert Object button on the Form ribbon toolbar (see The Form Objects for details about the available form objects). The new object is inserted in the cell, or, if no cell is selected, in the first empty cell. If there is no empty cell, the software adds a new row and places the form object in the first cell in that row.
|
•
|
Copy (
|
|
•
|
Duplicate (
|
|
•
|
Delete, to delete the form objects. You can also press Delete to remove form objects.
|
|
•
|
Settings (
|
|
•
|
Help (
|
For form objects that support methods that run on a data change, for example, the context menu also contains Create Local Method to create a local method, or Edit Local Method or Edit Method to open an already existing local method or other method in an editor window.
If you right-click on the Form window’s canvas, the context menu contains these additional actions:
|
•
|
Preview Form (
|
|
•
|
Paste Button (
|
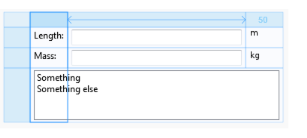
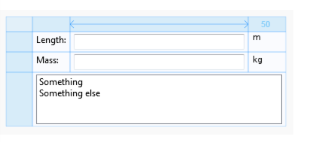
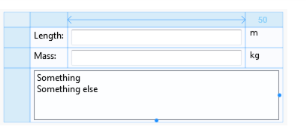
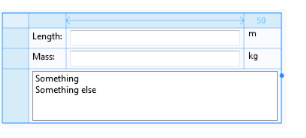
Figure 3-2: Selecting a column using the grid layout mode.
To change how to control the width of the column, use the Column Settings menu ( ) in the Form ribbon toolbar. The same menu is also available when you select a column in the form window and as a Column submenu when you select one or several cells and then right-click. The following options are available:
|
•
|
Fit Column (
|
|
•
|
Grow Column (
|
|
•
|
Fixed Column (
|
Similarly, to change how to control the height of a row, use the Row Settings menu ( ) in the Form ribbon toolbar. The same menu is also available when you select a row in the form window and as a Row submenu when you select one or several cells and then right-click. The following options are available:
|
•
|
Fit Row (
|
|
•
|
Grow Row (
|
|
•
|
Fixed Row (
|
When you have selected a row or column, you can use the Insert menu ( ), in the Grid section of the Form ribbon toolbar or on the context menu when right-clicking a selected row or column, to insert rows or columns:
|
•
|
|
•
|
|
•
|
|
•
|
|
•
|
|
•
|
You can adjust the alignment of form objects within the cells using the tools on the Align menu ( ) in the Grid section of the Form ribbon toolbar. The same menu is also available as an Align submenu when you select one or several cells and then right-click. To change the alignment, first select the cells with the form objects that you want to align, then select one of the following alignment options:
|
•
|
Select Fill Horizontally (
|
|
•
|
|
•
|
|
•
|
|
•
|
Select Fill Vertically (
|
|
•
|
|
•
|
|
•
|
To make a form object span multiple rows or columns, you can merge cells. To merge cells, first select them. Then click the Merge Cells button ( ) in the Grid section of the Form ribbon toolbar. When merging, there must be at most one form object in the cells to be merged because the new cell can only contain one form object.
The inverse of merging cells is to split a cell that spans more than one row or column. To split a cell first select it. Then click Split Cell ( ) in the Grid section of the Form ribbon toolbar. If there were any form object in the original cell, it is placed in the top left of the new cells.
If you want to extract a rectangular area (a subgrid) from a form to a new form, select the part of the grid that you want to extract, right-click, and choose Extract Subform ( ), or click the Extract Subform button in the Grid section of the Form ribbon toolbar. The extracted subgrid, with the form objects in that part of the original form, then appears in a new form, and the corresponding form window opens. The cells in the original form change into a Form reference object referring to the new form.
To change the number of rows and columns in the grid, click the Rows & Columns button ( ) in the Grid section of the Form ribbon toolbar. In the Rows & Columns dialog box that opens, specify the number of rows and columns in the Rows and Columns fields; then click OK. If the new size is smaller than the current grid size, rows and columns are removed starting from the bottom-right corner of grid. Also, the resizing of the grid removes any form objects that do not fit in the new grid.